Floors and areas
Map the floors and rooms in your home before you assign devices. With that structure in place, dashboards, automations, and voice assistants can understand requests such as “turn on the first-floor living-room lights.”
Why map your home?
Home Assistant uses a hierarchy to represent the physical spaces in your home:
- Floor: First floor, second floor, basement, or top floor.
- Area: Living room, primary bedroom, kitchen, or garage.
- Device/entity: A specific light, switch, or sensor assigned to an area.
Once you create floors and areas, Home Assistant can use that structure in several ways:
- Voice: “Hey Google, turn off all the lights on the first floor.” Home Assistant knows which lights belong there.
- Dashboard: Generate views organized by area.
- Automation: Use a condition such as motion detected in the primary bedroom.
Remember these four levels:
- Floor: Contains areas, not devices directly. Examples: 1st floor and 2nd floor.
- Area: Represents a room or space and can belong to a floor. Examples: living room and primary bedroom.
- Device: Can belong to one area. Example: a Xiaomi light bulb.
- Entity: Represents one function or data point exposed by a device. It inherits the device area by default, but you can override it. Example:
light.living_room_main.
A device or entity can belong to only one area, and an area can belong to only one floor.
Review your current setup
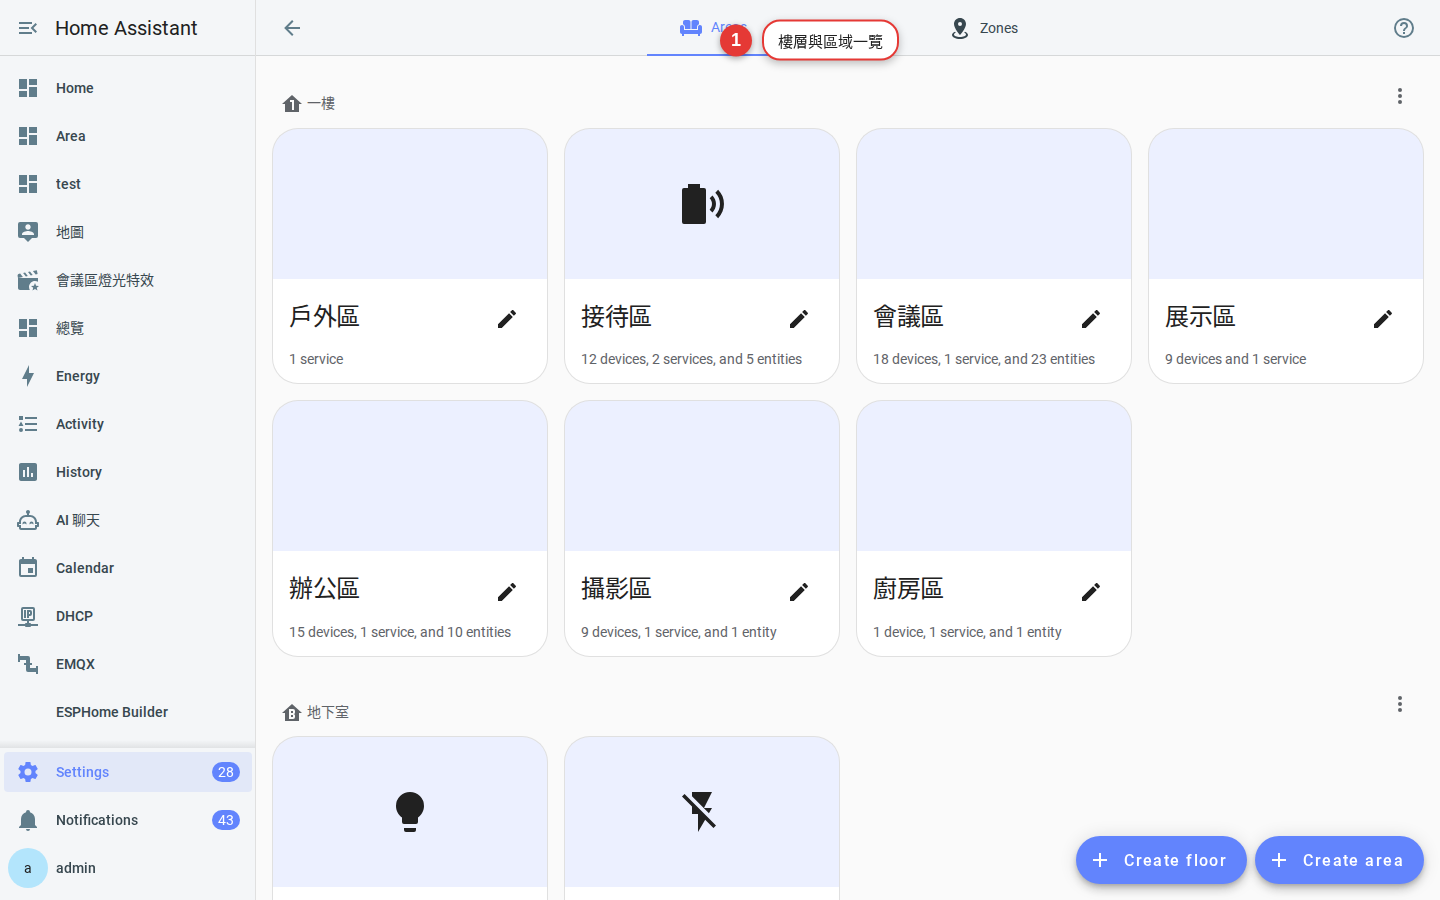
Open Settings → Areas, labels & zones and check what is already there. You will probably find one of these situations:
- Nothing yet: For a new installation, follow this chapter from the beginning.
- Areas but no floors: An older Home Assistant setup may predate floors. Add floors, then organize the existing areas.
- A confusing mixture: If you experimented earlier, decide whether reorganizing or deleting and rebuilding will be clearer.
Plan the structure first
Spend 5 minutes listing the spaces on paper or in your head:
- How many floors do you have? Will you include the basement?
- Which spaces on each floor will you mention in voice commands or automations?
- Should the balcony, entryway, and hallway each be a separate area?
LR, codes such as Zone_A, and vague plurals such as Bedrooms. They become hard to recognize later.Create floors and areas
-
Create a floor
Select Create floor in the upper-right corner. Enter “First Floor,” open the icon picker, and search for
floorto find a suitable icon. Save it, then repeat for “Second Floor,” “Basement,” and any other floors.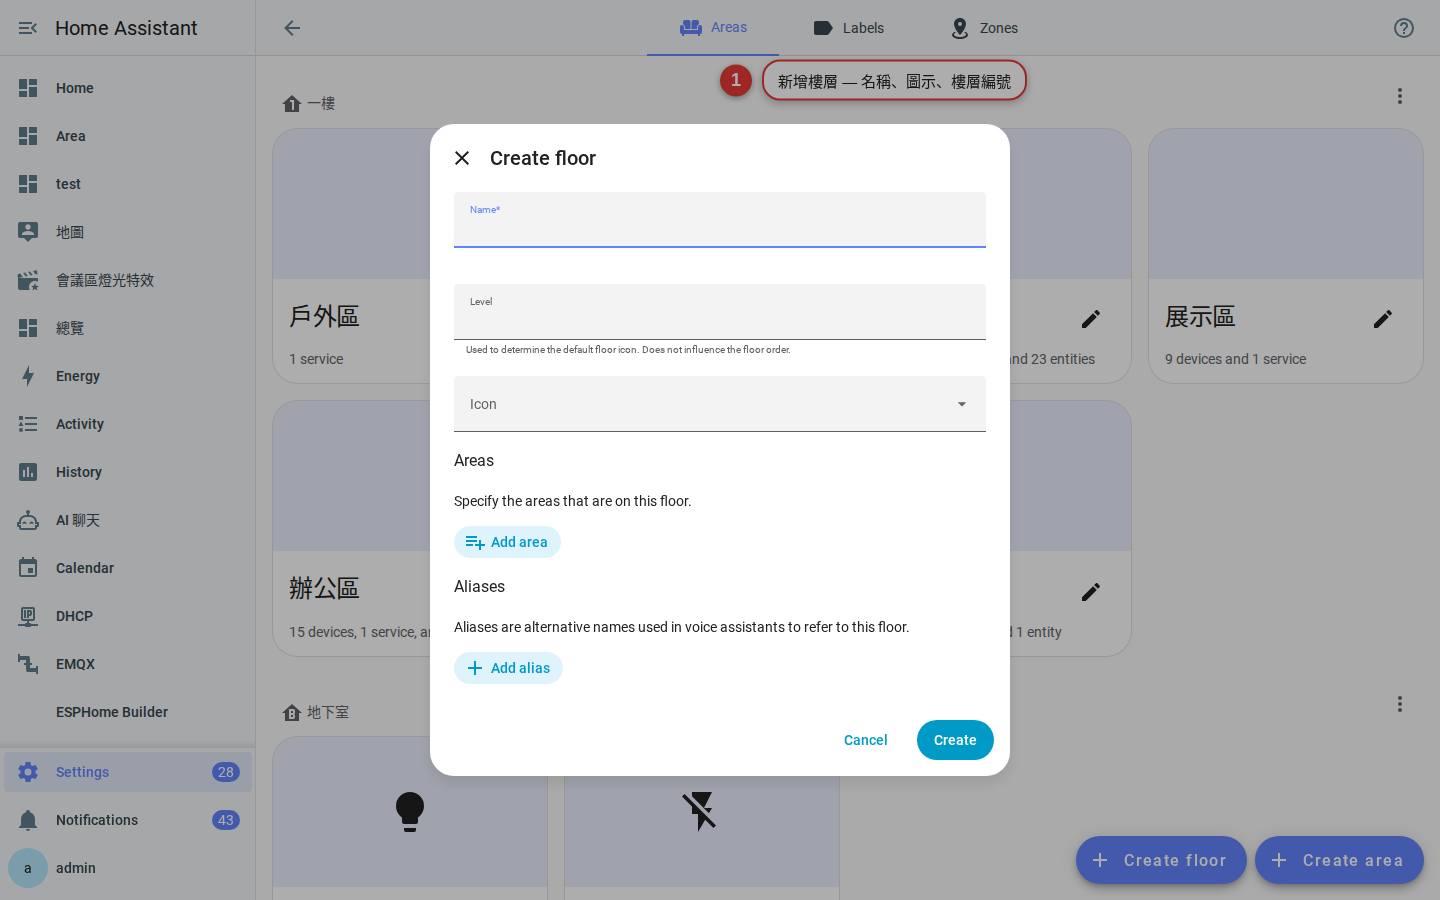
Figure 3-2 The floor dialog includes a name, icon, and floor level. -
Set the floor level
The floor level controls sorting. For example, use
-1for the basement,1for the first floor,2for the second floor, and10for the top floor. Dashboards and cards can then display floors in that order. -
Create an area
Select Create area under a floor. Enter “Living Room,” choose an icon such as
mdi:sofa, and save the area.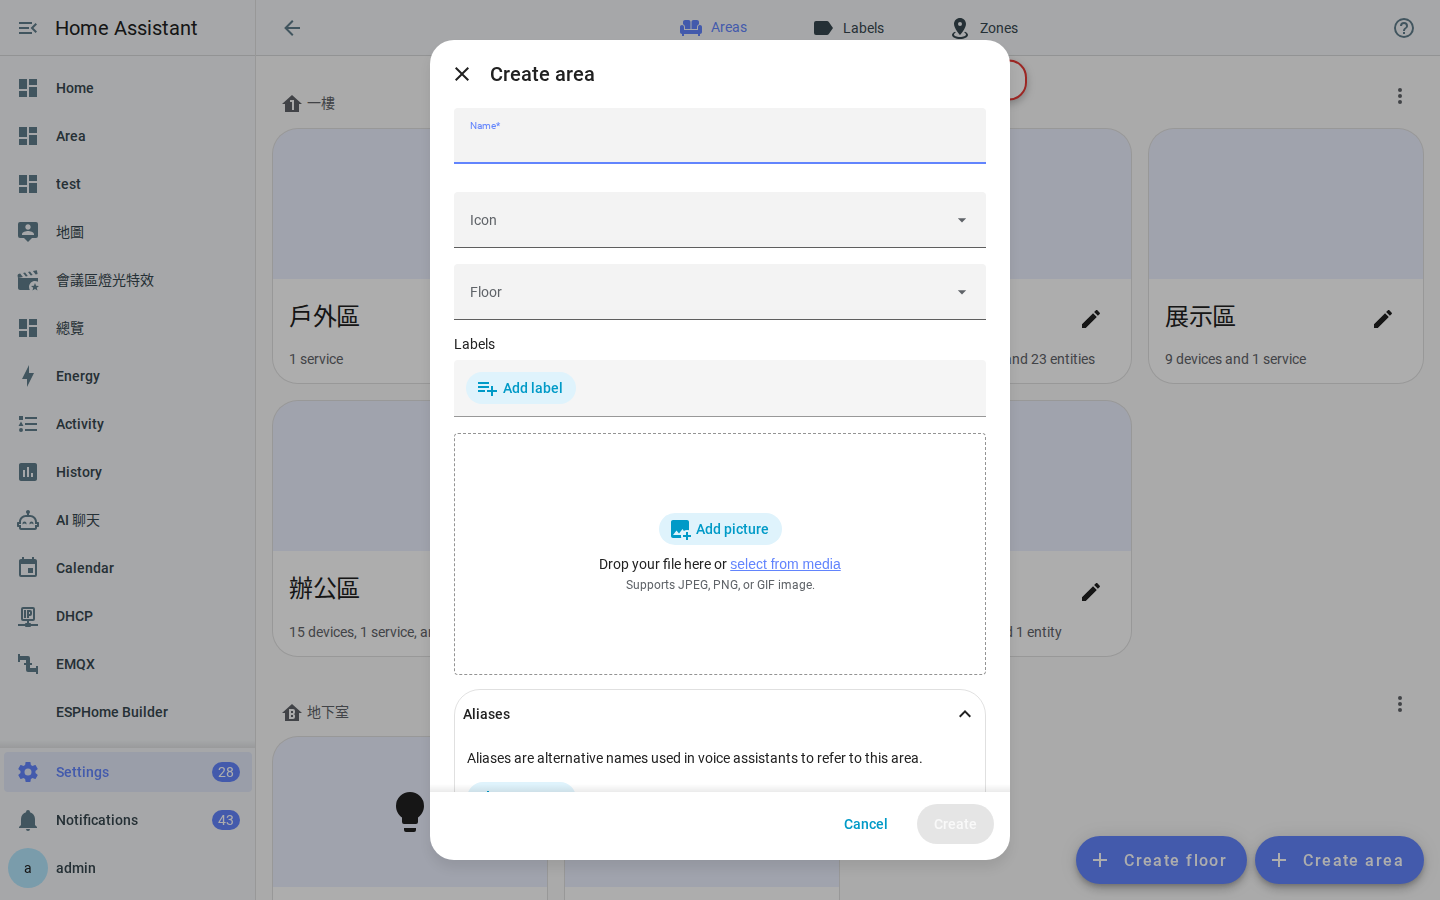
Figure 3-3 The area dialog includes a name, icon, and floor. -
Use this sample area list
First floor: Entryway, living room, dining room, kitchen, guest bathroom, and back balcony.
Second floor: Primary bedroom, primary bathroom, child’s room, office, and hallway.
Outdoors: Yard, garage, and front gate.
Tip: You can leave an outdoor area without a floor, or create an “Outdoors” floor to group outdoor spaces.
Assign devices to areas
The structure is useful only after you place devices in it:
-
Open the device list
Go to Settings → Devices & services → Devices to see all paired devices.
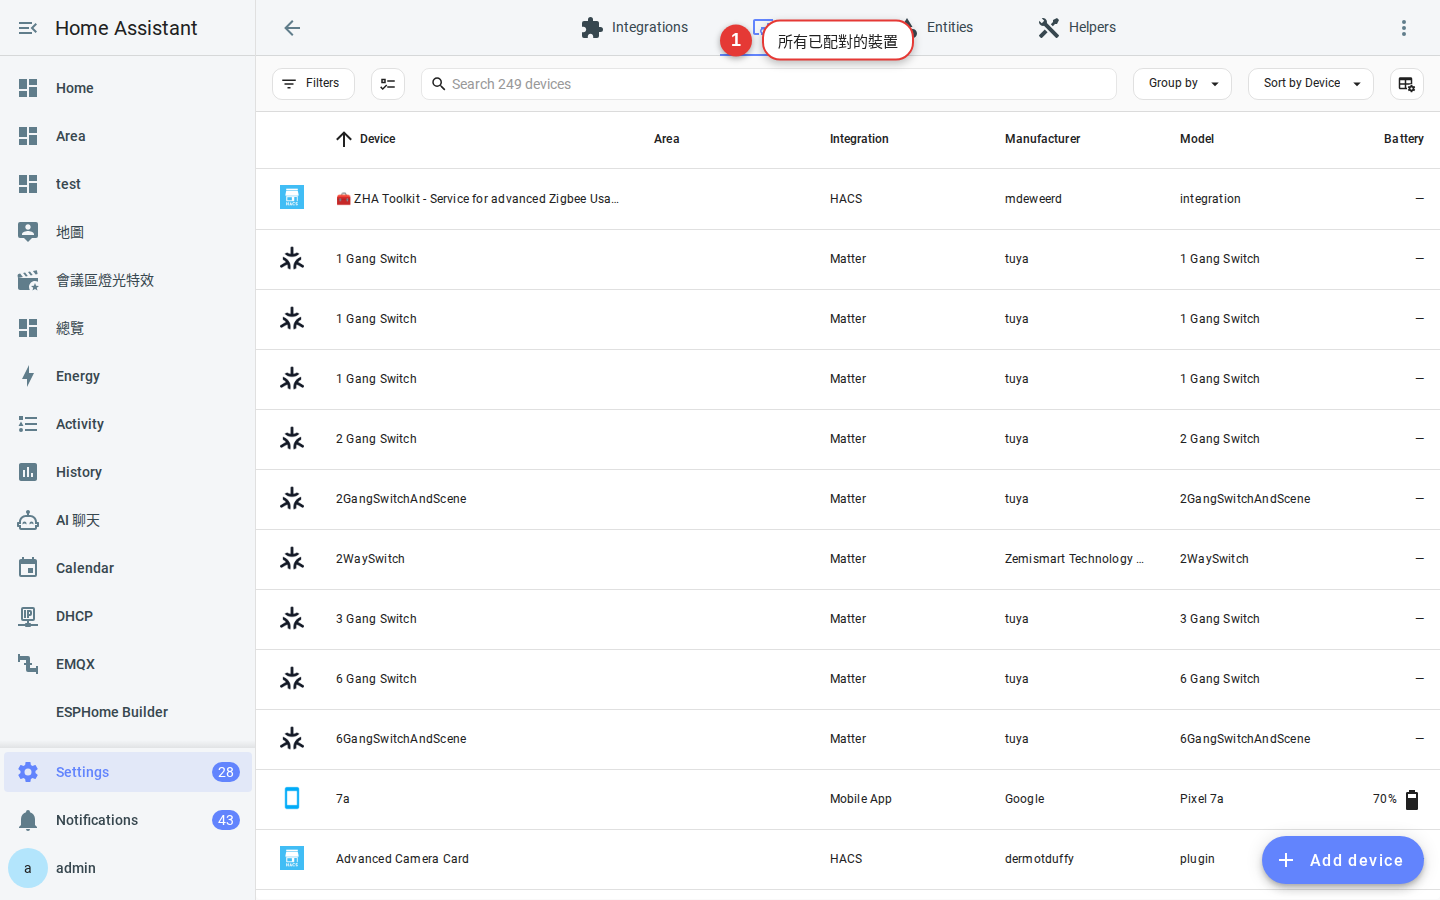
Figure 3-4 The device list shows each assigned area. Unassigned devices have a blank area. -
Edit a device and choose its area
Select a device, select the pencil in the upper-right corner, and choose an area from the list. Save the change.
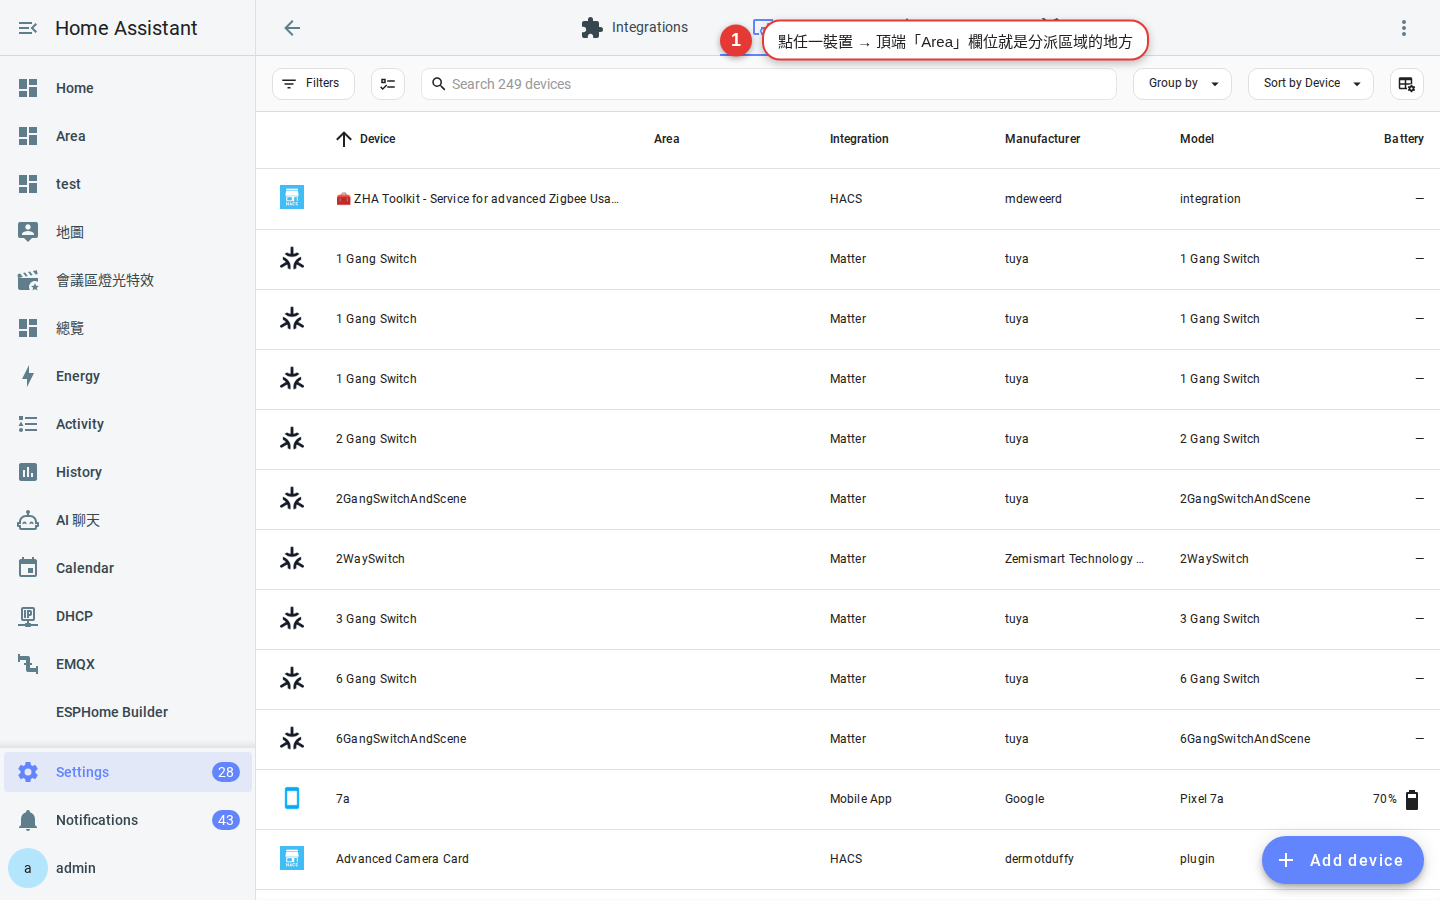
Figure 3-5 Assign a device to an area. -
Assign several devices together
Use Batch selection in the upper-right corner of the device list. Select several devices, then choose Move to area. This saves time after you install a roomful of lights.
switch.0x00abc123 with a recognizable name and use labels to group items across areas.Verify the finished setup
Return to Settings → Areas, labels & zones and compare your result with this example:
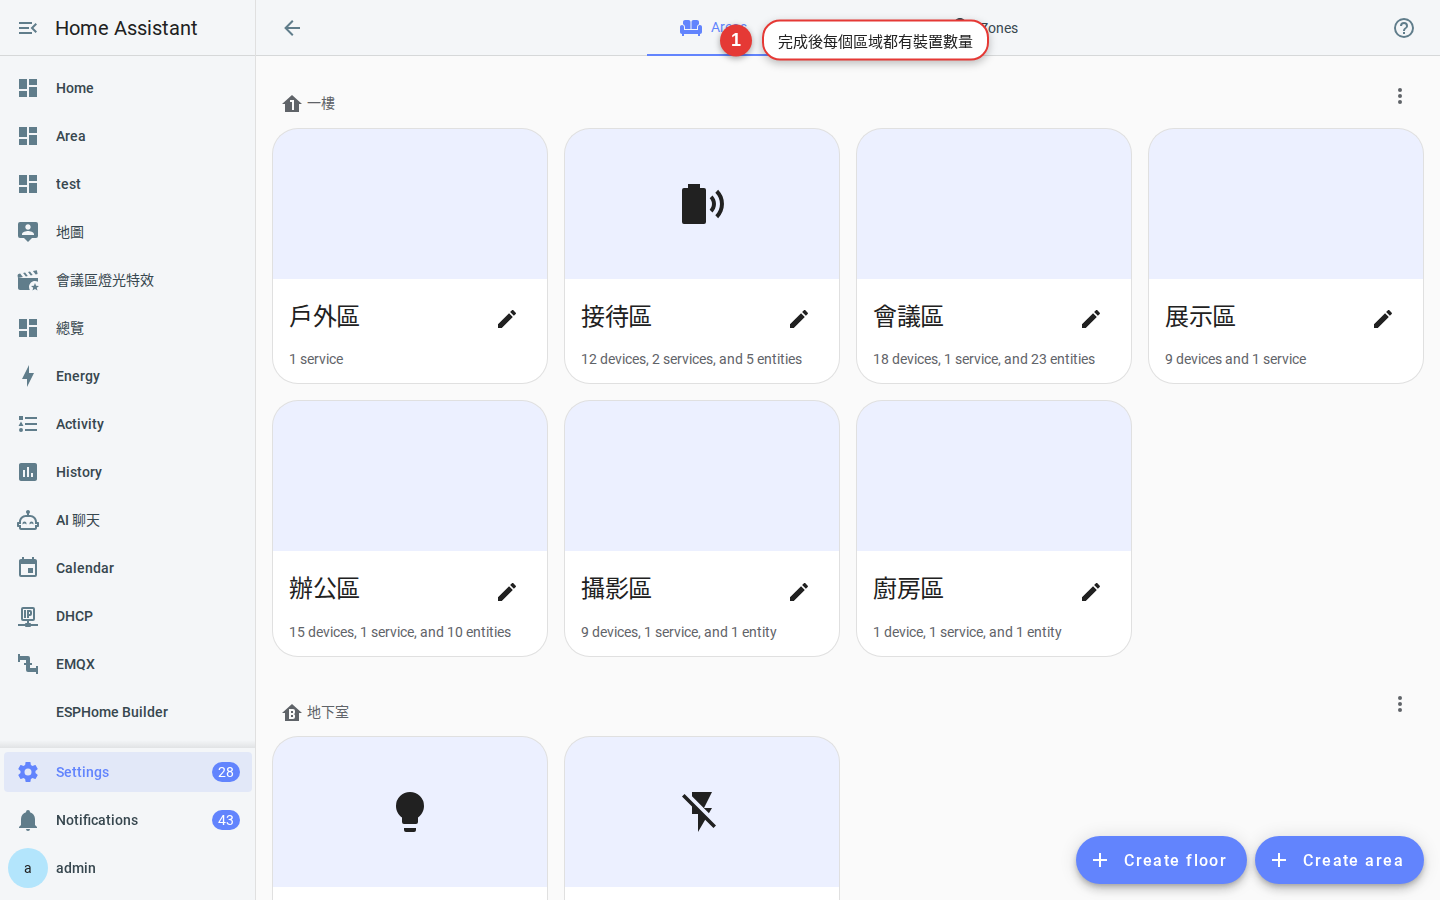
Next, open Home in the sidebar, called Overview in earlier versions. Switch to the view organized by area and confirm that Home Assistant has generated a card for each area.