User management
Create separate accounts for household members, tenants, and guests. Give each account appropriate permissions, link it to a person when needed, and prepare presence detection for “who is home” automations.
Why create separate accounts?
- Security: If everyone shares one Administrator account and a phone is lost, you may need to change the shared password on every device.
- Permissions: A standard user can operate the interface without receiving Administrator access to change settings or delete automations.
- Phone notifications: A separate login helps you identify the phone and send a notification to the intended person.
- Presence: Link each person to location trackers so an automation can respond when that person arrives home.
Understand users, persons, and device trackers
- User: An account that can sign in to Home Assistant. It has a password and either Administrator or standard-user permissions.
- Person: An entity representing one person. It can combine several device trackers, such as phone, Bluetooth, and GPS sources, to estimate whether that person is home.
- Device tracker: A source of location or presence data, such as the tracker created by the Companion App.
For example, link the user “alice” to the person “Alice.” After Alice signs in to the Companion App on her phone, its tracker can provide location data for that person.
For someone who only needs presence tracking, create only a person.
Create an account
-
Open Settings → People → Users
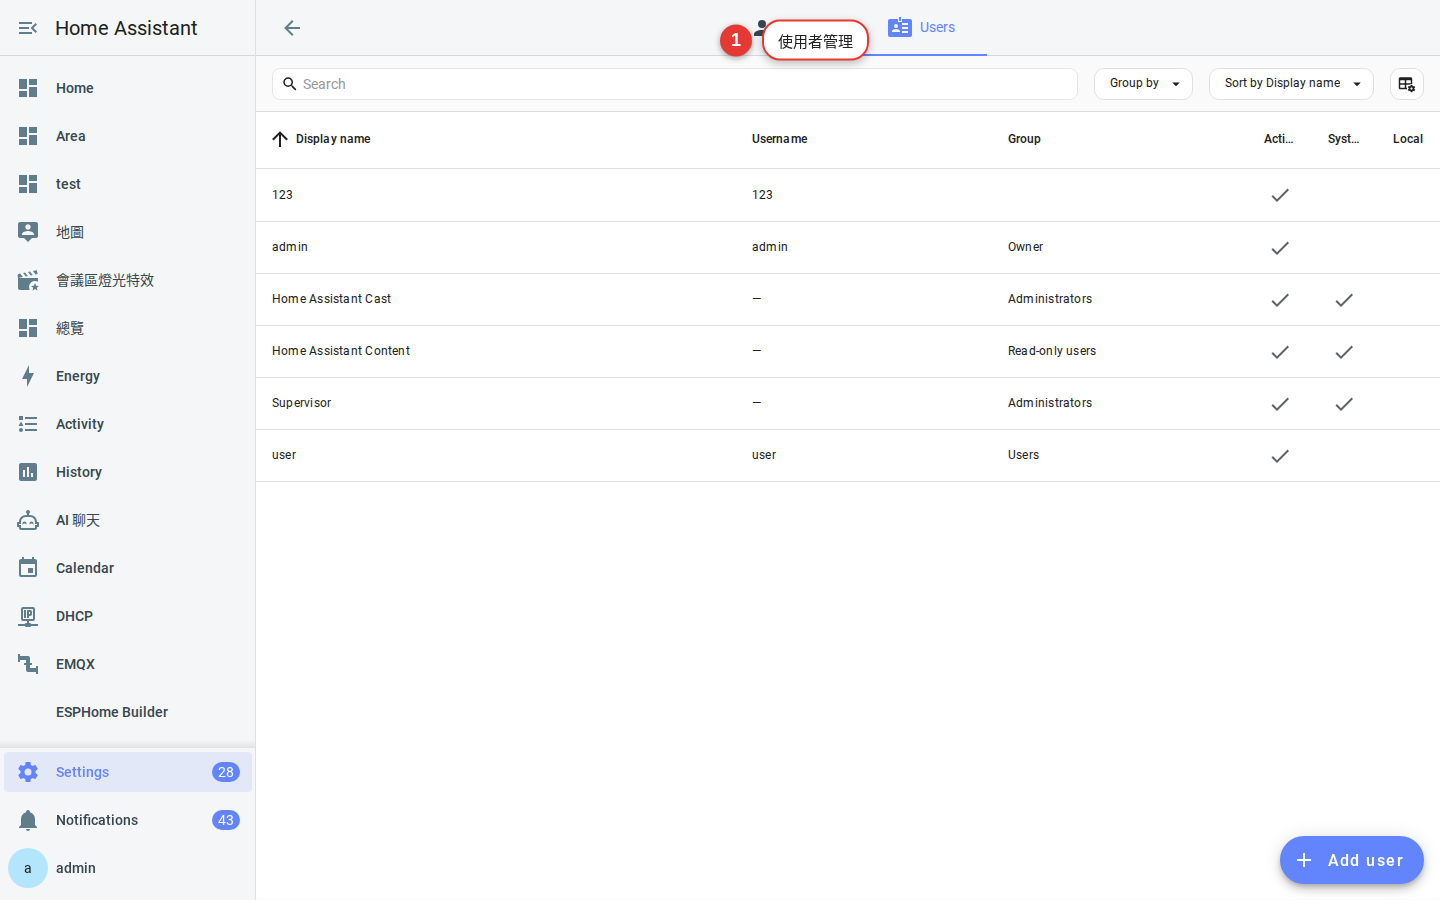
Figure 5-1 The Users tab lists every account that can sign in. -
Add a user
Select Add user in the lower-right corner. Enter a display name, a username for login, and a password.
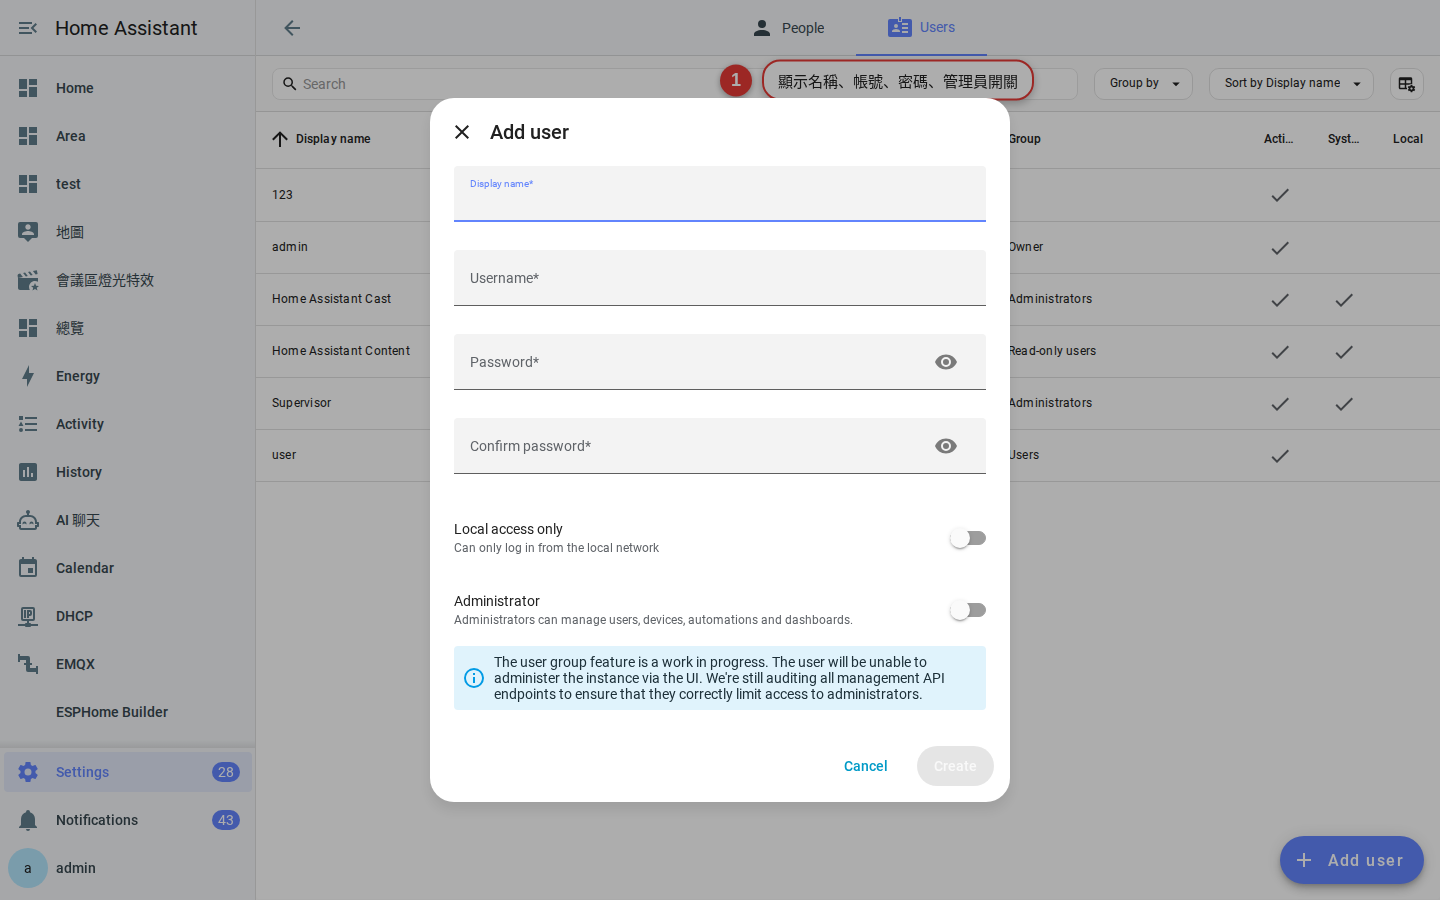
Figure 5-2 Review the Administrator option when you create a user. -
Choose the permission level
Administrator: Can change settings, add integrations, and create automations.
Standard user: Can operate the items available through the interface but cannot change system settings.Recommendation: Limit Administrator access to the people who maintain the system. For a household, the source suggests no more than 2 Administrators, such as you and your partner. -
Consider Local access only
When enabled, this account can sign in only from the local network and cannot use a remote URL. Consider this option for guest accounts.
-
Give the account to its user
Provide the Home Assistant URL, username, and initial password through an appropriate private channel. Chapter 7 shows how to sign in through the Companion App. The user can then change the password in their profile.
-
Restrict guest and child accounts
Use a standard account and enable Local access only. This limits the account to your home Wi-Fi and reduces its exposure through remote access, but it does not replace a strong, unique password.
Create and link a person
-
Open Settings → People
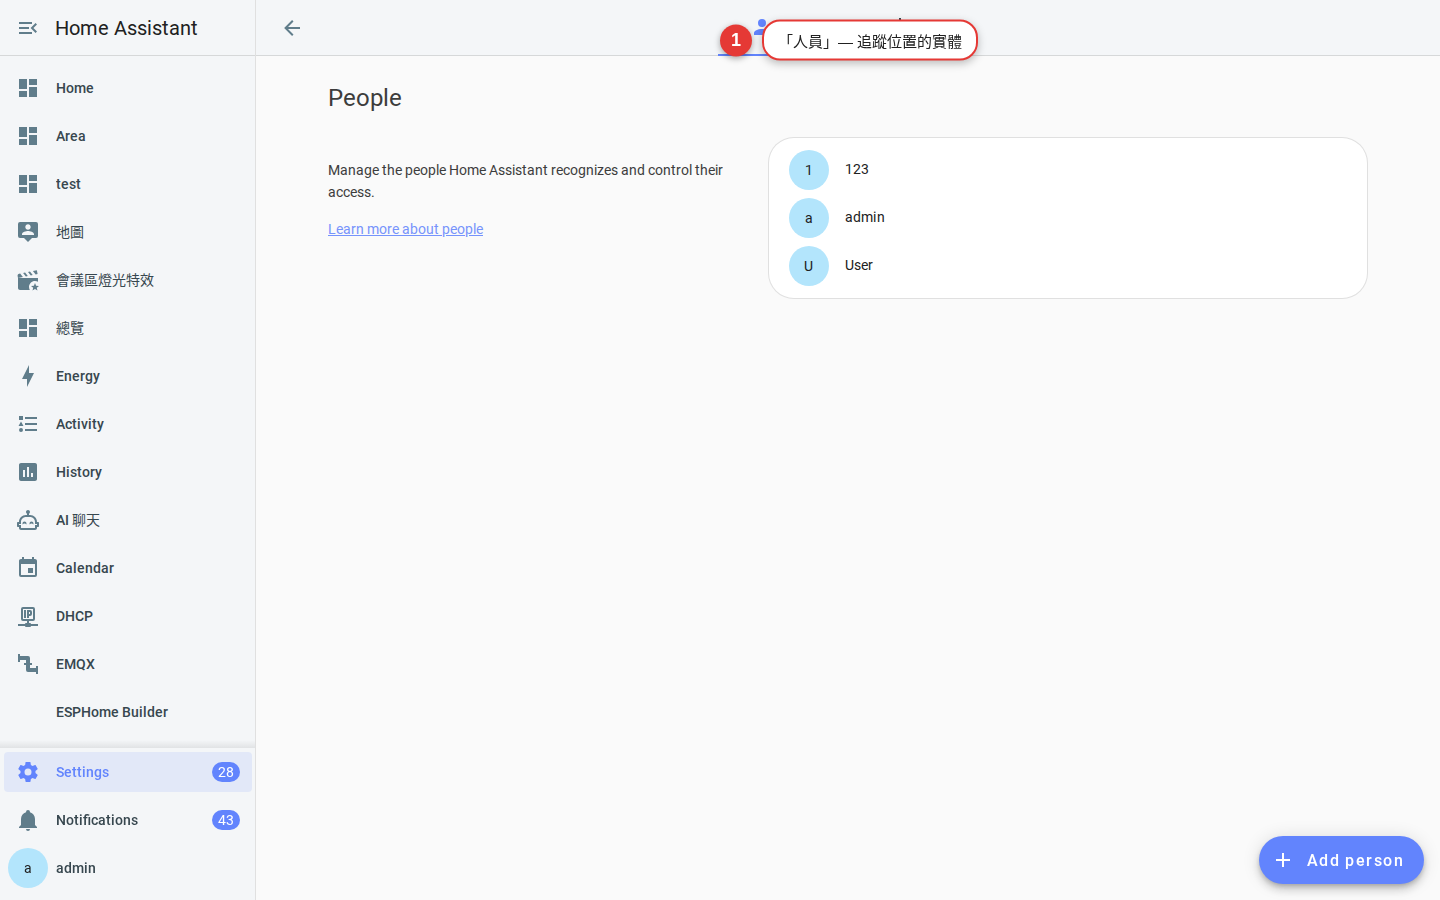
Figure 5-3 Each person can link to one user and several tracking devices. -
Add a person
Select Add person, then enter a name and choose a profile picture. A familiar name such as “Dad” or “Sam” will be easy to recognize on dashboard cards.
-
Link the user account
Select the user you just created. After the person signs in to the Companion App, the phone’s tracker can supply location data for that person.
-
Add other tracking sources
For someone without the Companion App, compatible integrations may expose a Bluetooth or GPS tag, router presence, or a Bluetooth beacon as a device tracker. Examples in the source include Mi Tag, AirTag, and Tile. Add available sources under Tracking device on the person page.
FAQ
Can one user link to several persons?
Can standard users see every device?
Do activity records remain after I delete a user?
Deleted user. If you need the account to remain identifiable, keep it and remove its Administrator permission instead of deleting it.Enable multi-factor authentication for the Owner
If someone obtains the Owner password, they can control the Home Assistant installation. Home Assistant supports time-based one-time passwords (TOTP) from authenticator apps such as Google Authenticator, Authy, and 1Password.
-
Open your profile and enable Advanced mode
Select your profile at the bottom of the sidebar and enable Advanced mode so the MFA options appear.
-
Open Security and add an MFA module
Go to the Security tab, enable TOTP under the multi-factor authentication modules, and scan the QR code with your authenticator app.
-
Enter a one-time code
Confirm setup with a current code. Future logins will require this extra step. Store the recovery codes securely and separately; you may need them if you lose access to the phone.
Troubleshooting
Did I accidentally remove the Owner’s permissions?
Why did a phone receive someone else’s notification?
notify.mobile_app_xxx targets a specific registered phone. Check that the automation uses the intended notification target. Chapter 7 covers this in detail.Why does a person show Away while they are home?
Set up a household member’s Companion App
After creating the user and person in the Chapter 5 steps above, complete the setup on that person’s phone. Follow the whole path from installation to the first test notification.
notify.mobile_app_xxx is now a notification action. Developer tools moved from the sidebar to Settings in 2026.2 and became Tools in 2026.8. The current test path is Settings → Tools → Actions. In earlier versions, use Developer tools → Services.-
Install Home Assistant
On iOS, find Home Assistant in the App Store. On Android, use the Play Store or the F-Droid build without Google dependencies. The official app uses a blue house icon.
-
Discover the server or enter its URL
On first launch, the app asks for the Home Assistant server URL. You have three options:
- Same Wi-Fi: The app can often discover the server. Select it from the list.
- Manual: Enter
http://192.168.x.x:8123for the local address, or enter the Nabu Casa or self-hosted reverse-proxy address. - QR code: To help someone enter the address, open
URL → QR generatoron your phone and let them scan it.
-
Use their account, not yours
Sign in with the user you created for that person. This associates the phone with their account, and its notification action will be named
notify.mobile_app_family_username. Signing in with the wrong account is a common reason notifications reach the wrong phone. -
Allow background location access
Choose Always on iOS or Allow all the time on Android, not an option limited to app use. Home and away detection needs location updates while the app is in the background.
Warning: Since iOS 15, the initial choice may be While Using the App. To enable background reporting, open Settings → Apps → Home Assistant → Location on the phone and choose Always. -
Allow notifications and review battery optimization
On Android, exclude Home Assistant from restrictive battery optimization if notifications are delayed; the source reports possible delays of 15-60 minutes under aggressive power saving. On iOS, make sure notifications are enabled.
-
Verify the location data
In Home Assistant, open Settings → Devices & services → Devices and select the registered phone. Its device page should list entities such as
sensor.mobile_battery / sensor.mobile_geocoded_locationand show the current location on the map. If the location is blank, recheck the phone’s location permission. -
Send a test notification
Go to Settings → Tools → Actions, select
notify.mobile_app_family_username, enter “Test” as the message, and run the action. The source expects delivery within 1-3 seconds under normal conditions, but network and platform delays can vary. If nothing arrives, check notification permission and the selected target.
device_tracker.phone for home/away state, sensor.mobile_battery_level, sensor.mobile_battery_state for charging state, and sensor.mobile_geocoded_location for a readable location. To enable more sensors, open Settings → Companion App → Manage Sensors in the app and review options such as step count, activity type, Bluetooth devices, and battery temperature.Tune the home zone radius
zone.home is the circular map area used to determine whether a person is home or away. Its default radius is 100 meters. Indoor GPS variation can place a phone outside a circle that is too tight, especially in large buildings or locations with weak reception.
-
Open the Zones tab
Go to Settings → Areas, labels & zones → Zones. Note: An area is a room or space inside the home. A zone is a circle on a map, such as home, work, or school. Use the zone here.
-
Select home and adjust the radius
The source suggests 150-200 meters. Watch the circle update on the map and choose a radius that covers the property without extending much farther than needed.
Warning: Do not make the zone unnecessarily large. At more than 500m, it may include much of the surrounding neighborhood. A trip to a store 100 meters away could still count as being home. -
Add work or school zones
Select Create zone, search for an address or choose a point on the map, and name it “Work” or “School.” You can then build an automation that notifies a parent when a child arrives at school.
-
Use a passive zone when appropriate
Enable Passive when a zone should not change the person’s displayed state, such as showing “At work,” but should remain available to automations. This is useful for a landmark you want to detect without making it the person’s primary state.